How to Fix a Mountain Bike Chain – Broken, Skipping, or Loose
They say a chain is only as strong as its weakest link and we couldn’t agree more. A weak link, a slight bend, or a twist in the chain of your mountain bike, if left unchecked, can cause damage to both your bike and yourself. This article will guide you through what commonly causes chain problems and how to fix a mountain bike chain that is broken, skipping, or loose.
To fix a mountain bike chain that’s broken, use a chain tool to remove broken chain links, then reconnect the chain. If the mountain bike chain is skipping, loosen the bolt on the rear derailleur where the cable exits and adjust the cable to the desired tension. If the chain is loose use a chain breaker to cut some chain and then reconnect the chain ends together.
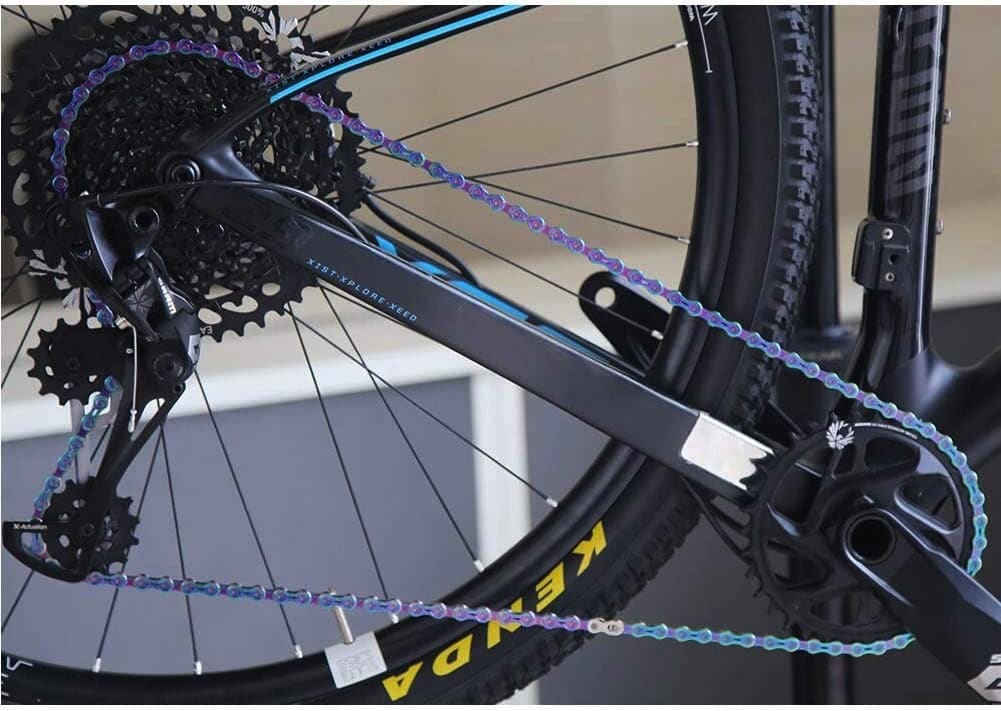
What Causes a Mountain Bike Chain to Slip, Break, or Skip?
Prevention is better than cure. In that spirit, let us look at some of the issues that cause a mountain bike chain to slip, break, or skip and see if damage to the chain and other components can be prevented.
A mountain bike chain is more likely to break when the bike chain or cogs are worn, when the chain gets hit hard during gear shifting, when the bike is under a heavy load, when chain installation is done poorly, and when the chainring teeth are bent.
Our article about how to fix a mountain bike chain that keeps jumping gears or slipping has several tips to help you diagnose common chain problems as well as solutions to fix your bike chain.
Here are the common causes of a chain breaking:
A Worn Out Cog or Chain
Nothing is immune to aging, but how long a mountain bike chain will last can depend on how well it is taken care of, as we explain in our quick steps to clean a mountain bike chain properly and lube it, and how often you ride your bike, and even how you ride your bike. Shifting gears under a heavy load can cause damage to the chain even if a chain is well taken care of, it will eventually wear out.
The same is true for the cog. Sometimes a damaged or worn-out chain can cause damage to the cog, causing it to wear out early. Since it is much cheaper to replace the chain than to replace the cog with one like this, it is a good idea to change your mountain bike chain as soon as it wears out. Rat Race Cycles servicing company suggests in this article that the likelihood of the cogs being worn out increases if you let your chain reach a stretch of 1% without replacing it. To avoid replacing the cogs, it is best to replace your chain when it has stretched 0.75%.
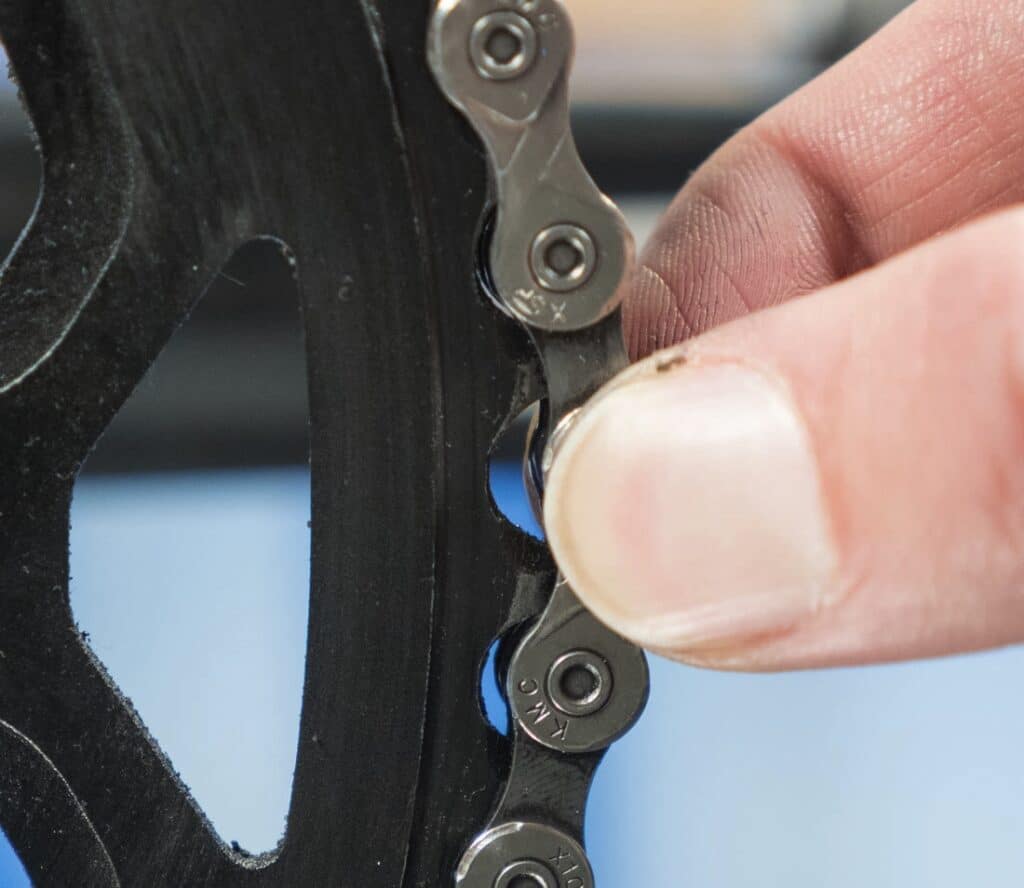
Now, how do you know when your chain has worn out? One of the ways is to put the chain on the largest chainring and at the forward-facing part, try to lift the chain away from the ring. If the chain is in good condition, you will hardly see any of the chainrings underneath it when you try to lift it, but a worn-out chain will reveal more and more of the chain ring. If you can nearly lift it clear of a tooth, then it’s time to change the chain. Our article about how to fix a mountain bike chain that is too long offers helpful tips to identify a chain that is too long and how to fix it.
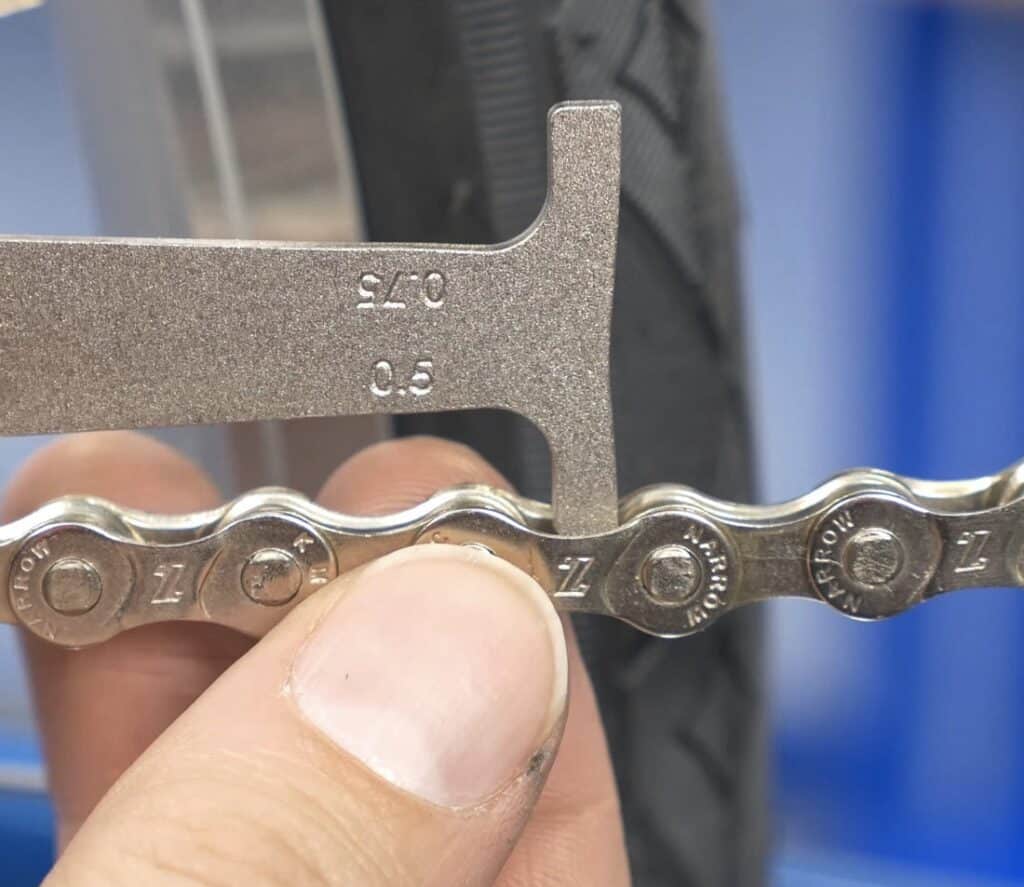
Another way to check the condition of the chain is to use a chain checker tool like this CC-3.2 from Park Tool. The tool has a hook end and an end with a 0.5 stamp on one side and a 0.75 stamp on the other side. To check the condition of the chain using this tool, install the hook end on a link with inner plates and check the wear with the other end. If the other end with the 0.5 stamp or 0.75 stamp doesn’t go in the chain, it means your chain isn’t worn, but if it does, it means it has worn out to the indicated percentage. If your chain is designed for eleven or more gears, use the 0.5 stamp side of the chain checker tool and replace the chain with one like this. If it is 0.5 percent worn. However, if your chain, like this one, is designed for ten or fewer gears, you should replace it when it is 0.75 percent worn.
To ensure your safety it is best to check your chain and replace it when it is worn out. A worn-out chain has probably gone through a lot of grinding with the chainring teeth and has lost its strength over time, making it easier to break. As a worn-out chain gets stretched, it also becomes loose, making it easier to fall off the ring while shifting gears or during impact. This can cause some serious injury to the rider if it happens at the wrong time. Our article about quick and proper mountain bike chain maintenance will explain the best time to clean and lubricate your chain so that you can prolong its useful lifespan.
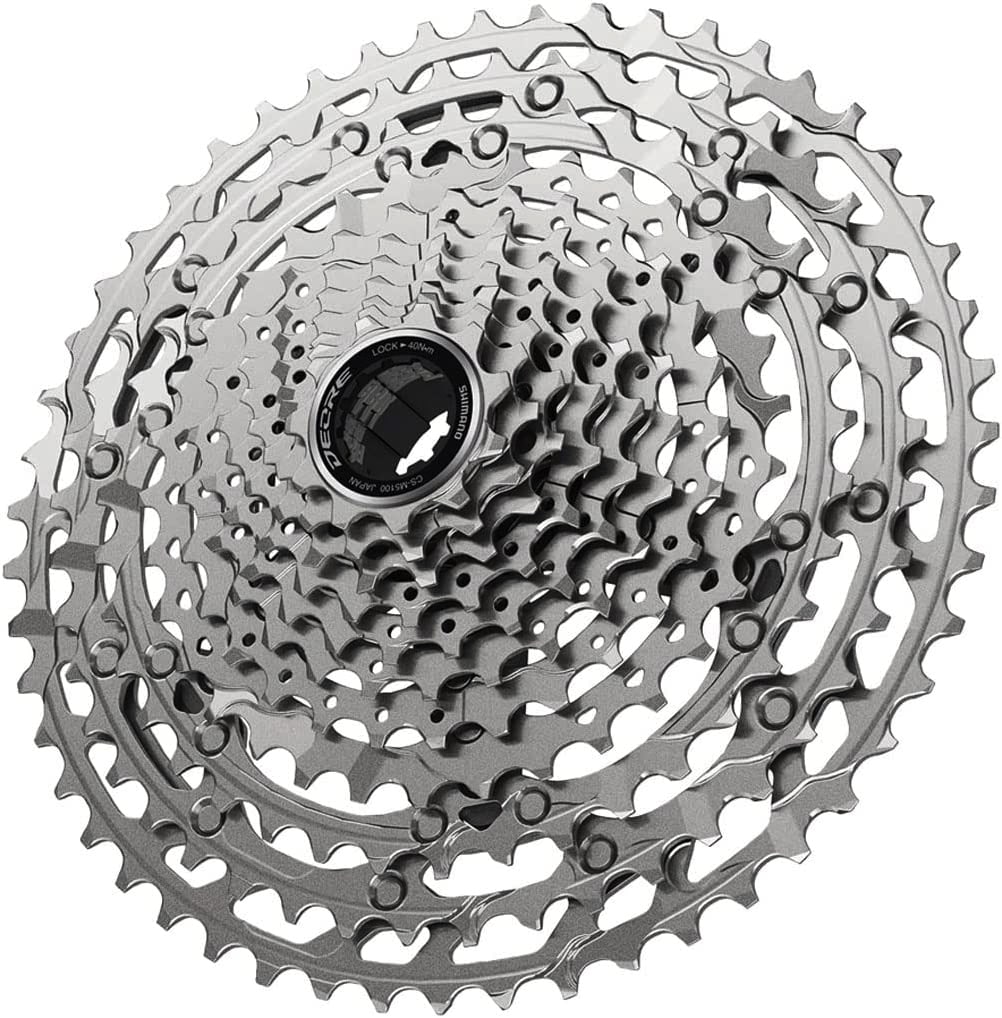
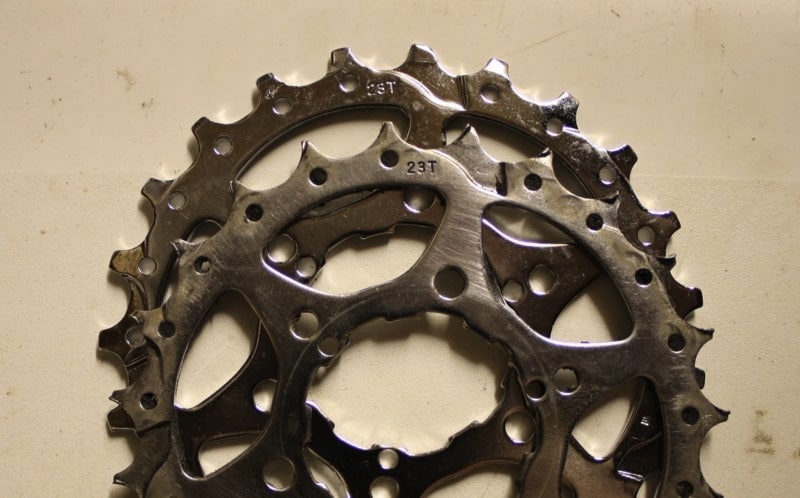
If left unattended for a long time you’ll find it is not only the chain that you’ll need to replace but also the cassette. When a cassette becomes worn out, the distance between its teeth increases. This might not be noticeable with the old worn-out chain as the increased distance between the teeth is consistent with the stretch of the old chain, but when you replace the old chain with a new one, the problem will become clearer. The links of the new, unstretched chain will not line up with the teeth of an old, worn-out cog. As this article from whpva.org explains a worn-out cog or chain dramatically reduces pedaling efficiency and power transmission on a bicycle.
When the MTB Chain is Hit Hard
Another way a chain can break is through impact—the chain doesn’t even have to be worn out. While a new chain might break less easily compared to an old, worn-out chain that has already sustained some damage, it can still break if it is hit hard enough according to this article from bike manufacturer, Velo. If a chain is damaged due to impact it becomes very difficult to repair as the damage is often done to more than one link of the chain.
MTB Gear Shifting When Under Heavy Load
When you are shifting gears under extreme loads and too much pedaling force is applied to the chain, it can cause your chain to snap. This can happen with both a new chain and a worn-out chain. Sometimes, the chain may not snap at that moment but the force applied to it can shift the plates or links of a chain link outwards, thus compromising the strength of the chain. The chain may continue to run just fine but it can snap at any moment when there is a little extra load. Staying on top of chain maintenance will keep you aware of any damage done to the chain and will allow you to fix it in time.
Poor Chain Installation
According to this thread on BikeForums.net a chain can also break if you have not installed it properly. Sizing the chain is a crucial step when it comes to the proper installation of your chain. The size chain you need will depend on the number of gears you have on your bike according to this article from ParkTool. Make sure that you have sized the chain properly so that it can operate in any gear without causing damage to other parts of the bike. An oversized chain can fall off the chainring and cause the bike to skip while a chain that is not long enough can make it difficult to shift gears and can snap easily under load.
Once you have selected the right size chain, you will have to join the links of the chain to make sure the installation is complete, if those links are not joined properly, it can also compromise the strength of the chain and cause it to snap. Using the right chain tool to join the links together can help prevent this problem. Our article about mountain bike chain installation explains the steps of selecting and installing the right chain for your bike. Similarly, be sure to read our related article with tips to choose the number of links in a mountain bike chain for more information.
Bent Chainring Teeth
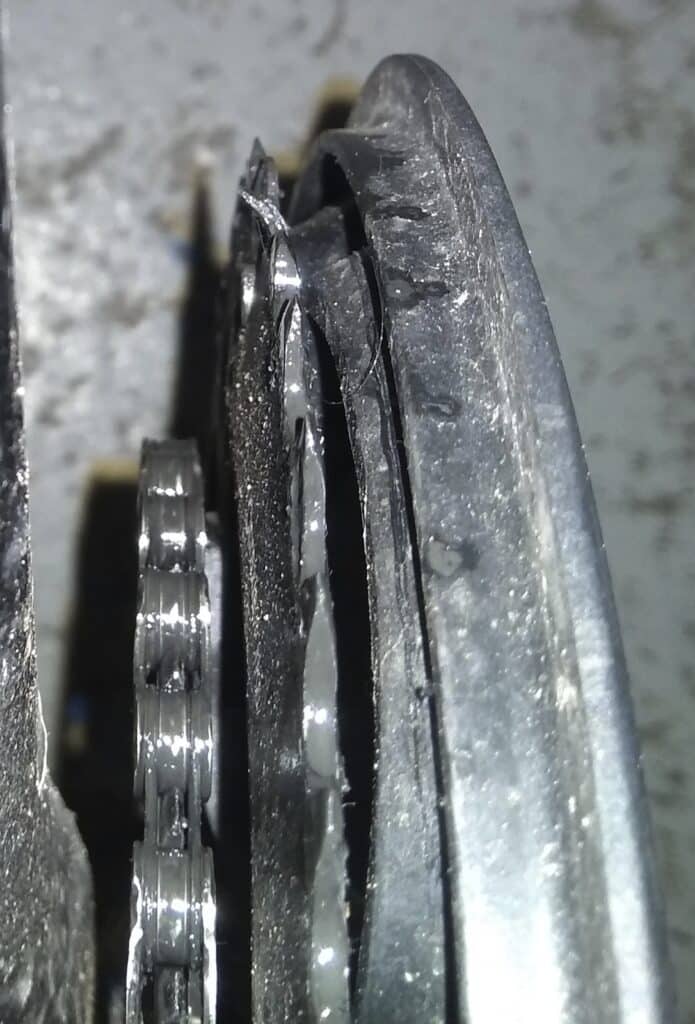
It is just as important to check the condition of your chainring as it is to assess the condition of the chain. Just as a worn-out chain can cause damage to the cogs, a bent chainring can cause damage to the chain and even cause it to break. A bent chainring can be a result of being hit by a flying rock or being dragged over a rock ledge. Sloppy gear shifting can also cause damage to the chainring teeth. A bent chainring tooth can be straightened back into place using an adjustable open-end wrench but if the tooth breaks in the process, you will have to replace your chainring with one like this.
You may also find interest in learning whether you need a mountain bike or a road bike chain before you install it. Our related article will tell you more.
Bike Chain Tools Needed to Fix a Mountain Bike Chain
If you are planning to fix your mountain bike chain it will be a good idea to look at the summary below of the tools needed so that you are well equipped for the task at hand.
Fixing a mountain bike chain successfully will require certain tools and equipment such as a chain breaker, master link pliers, a chain riveter, a chain checker tool, a chain strength gauge, a connecting rivet, and a master link.
Here is a summary of the bike chain tools that you will need to fix your mountain bike chain:
| MTB Chain Tool | Uses | Product Example From Amazon | Price |
| Chain breaker | It is used to break bicycle chains by pushing the rivets out | Park Tool Chain Tool - CT-3.3 | ~$45 |
| Master link pliers | They are used for both installing and detaching the master link with ease | Park Tool Master Link Pliers MLP | ~$20 |
| Chain riveter | It is used to both install and to remove chain rivets | Shimano TL-CN28 Chain Riveter | ~$40 |
| Chain checker tool | Used to measure 0.5 percent and 0.75 percent stretch in a chain | Park Tool CC-3.2 | ~$15 |
| Chain strength gauge | Checks chain wear up to one percent. | Cuticate chain checker indicator | ~$25 |
| Connecting rivet | Used to connect the chain ends together | Shimano 8-speed connecting pin | ~$20 |
| Master link | Used to connect the chain ends together | Shimano Kmc Master Link | ~$10 |
Similarly, you might find interest in learning how to stop a mountain bike chain rubbing the front derailleur. Be sure to read our related article for more information.
How to Fix a Broken Mountain Bike Chain Using Master Link
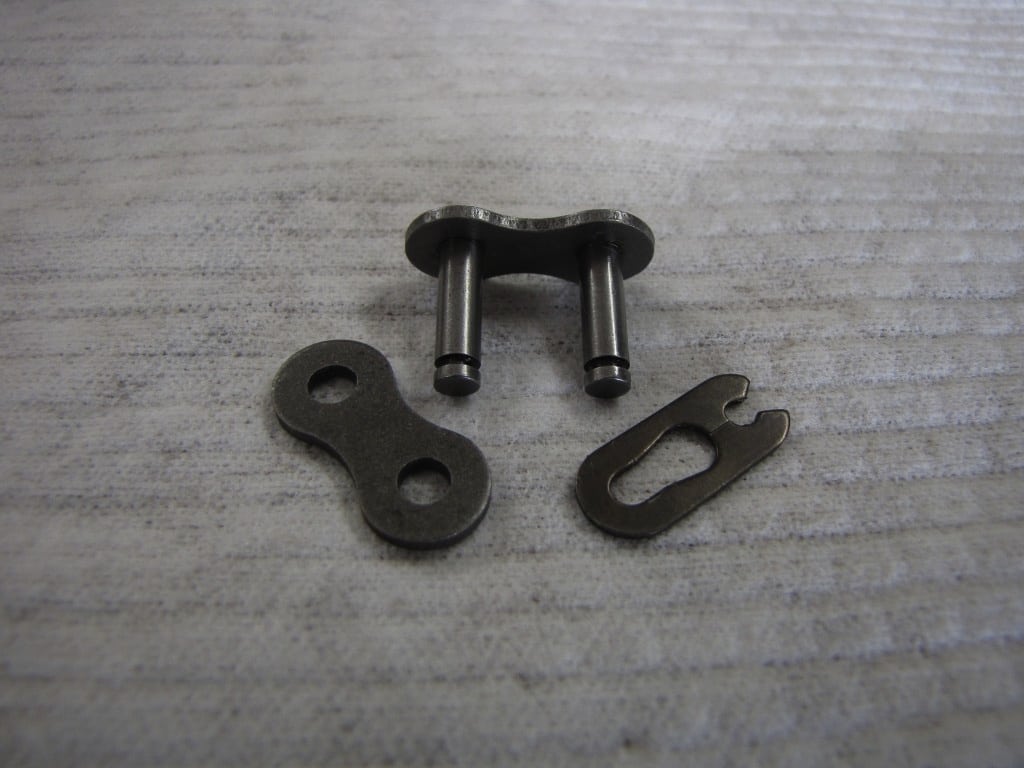
There are multiple methods that can be used to fix a damaged chain and one of them is fixing it using a master link. A master link is also called a quick-release link and is known for its easy attachment and detachment. A master link is similar in shape to the regular chain links but it is usually colored differently to make it easier to identify.
To fix a broken MTB chain using a master link, first get the correct chain master link. Then, using a chain tool, remove the damaged chain plates. Next, reconnect the chain using a master link then rotate the chain, and while at the upper row, apply the rear brake then apply force on the pedals.
Check out our article for more details on how to fix a mountain bike chain that keeps breaking.
Step 1. Remove the Damaged Link
The first task is to identify the rivet of the chain where the break has occurred. If your chain has snapped, identifying the damaged links will be obvious (they will be at the ends of the chain). However, if your chain is only skipping, to identify the damaged link, back pedal the cranks. When the damaged link passes over the rear mech’s jockey wheel, the chain will jump and that’s how you will be able to find the damaged link. You can also visually examine the chain links to check for any damaged plates. Once you have identified the damaged link, it is time to remove it. Using the chain tool from a kit like this, press out both the rivets to remove the damaged plates.
Step 2. Reconnect the Chain Using a Master Link
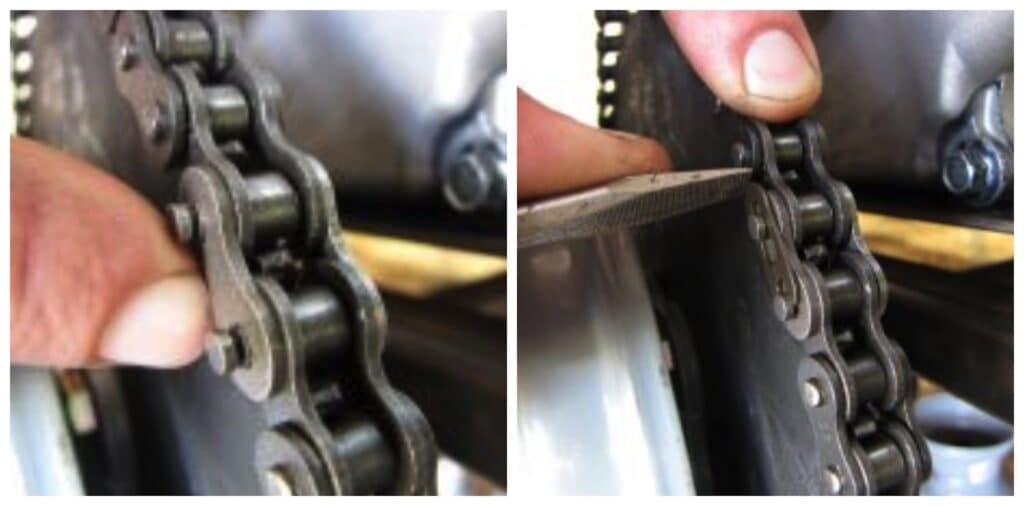
Now that the damaged link or links have been removed, it is time to reconnect the chain using a master link like this. To connect the chain using the master link you will simply have to align the opposing ends of the chain and connect them by inserting the master link plates that have pins on them. Make sure the pins are facing outwards.
Once you have done that, attach the other master link plate on the other side, and then attach the master link spring clip using the large slotted holes. Pay attention to any directional arrows on the master link and make sure that they follow the direction of the chain travel. Doing this will put the link in place but your job is not done here, you still need to lock the link in place.
You might also find interest in learning the differences between mountain bike wax and chain lube. Be sure to read our related article for more details.
Step 3. Locking the link in place
To lock the master link in place, make sure it's on the upper row of the chain, apply the rear brake, and apply force to the pedals. The goal is to pull the link apart so that it locks into the smaller section of the slot. You will hear a clicking sound when that happens. Another way to lock the link in place is to use a closing tool such as these Park Tool Masterlink Pliers.
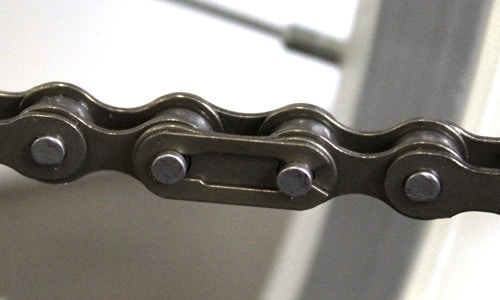
Examples of Different Chain Master Links
| Chain Master Link Example from Amazon | Brand | Outer Material | Compatible Drive Speed |
| 8 Pairs Bicycle Missing Link | Hotop | Stainless Steel | 6/7/8/9/10 |
| Single Speed Removable Quick Split Chain Link | Zonkie | High-Carbon Steel | Single speed |
| Sram Power Lock Link | SRAM | Steel | 12 |
| Kmc 11-R Missing Link | KMC | Stainless Steel | 11 |
| Kmc 10-R Missing Link | KMC | Stainless Steel | 10 |
| Sram PC-870 | SRAM | Nickel | 6/7/8 |
Fixing a Broken Mountain Bike Chain Using A Connecting Rivet
If you do not have a master link, another way to fix a broken or damaged mountain bike chain is by using a connecting rivet. The connecting rivets usually have a special flaring and a pilot tip that needs to be broken off once the rivet is fixed in place.
To fix a broken mountain bike using a connecting rivet, first remove the broken chain links by pushing out the connecting rivets using a bike chain rivet remover then fit a corresponding inner plate, and lastly push the chain rivets in.
Step 1. Remove the Damaged Part
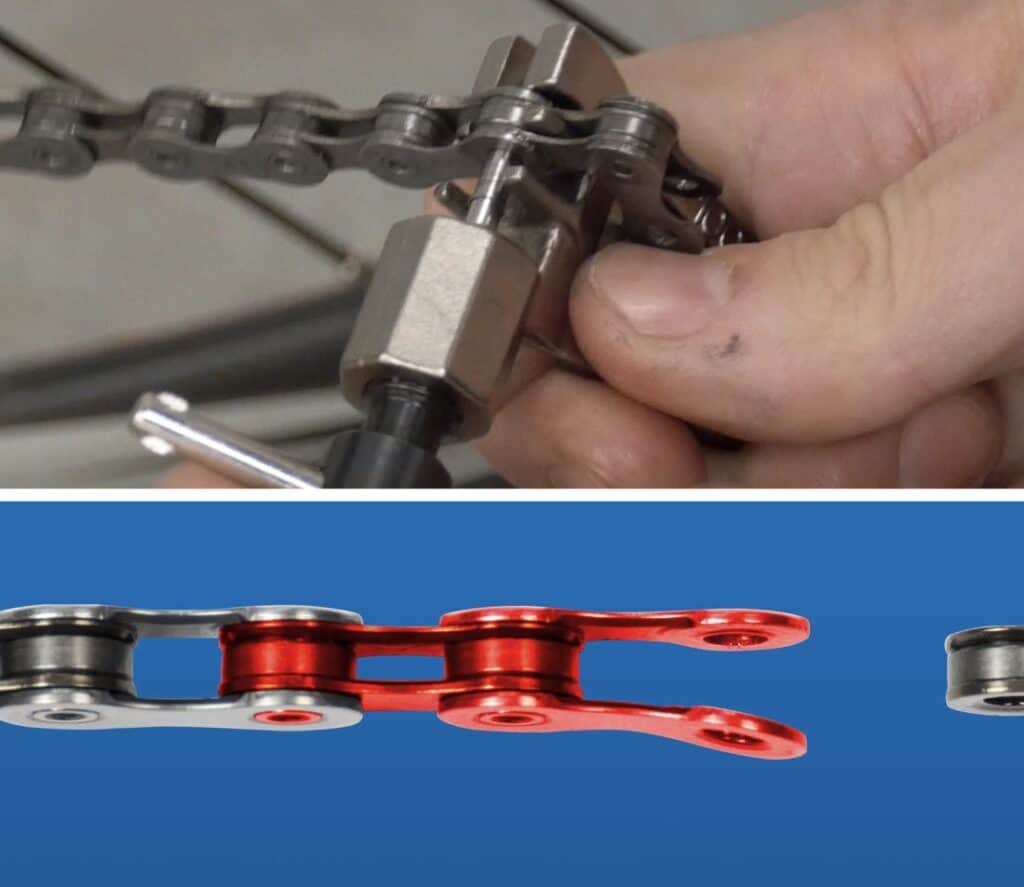
The first task is to identify the damaged link of the chain and remove it. To do this, you will have to push out the rivets using a chain rivet remover and remove the broken link as well as the neighboring link. This, you should do if you are planning to use a new connecting rivet to join the chain. However, if you want to reuse the existing rivet, just push it back enough to remove the damaged part of the chain.
Step 2. Reconnect the Chain
The next step is to join the two ends of the chain by using the new connecting rivet or by reusing the existing one. In the case of the former, use a chain tool to push the connecting rivet or pin in and then snap off the excess section or the pilot tip of the rivet. In the case of the latter, just push the rivet back in until it matches the depth of the neighboring rivets.
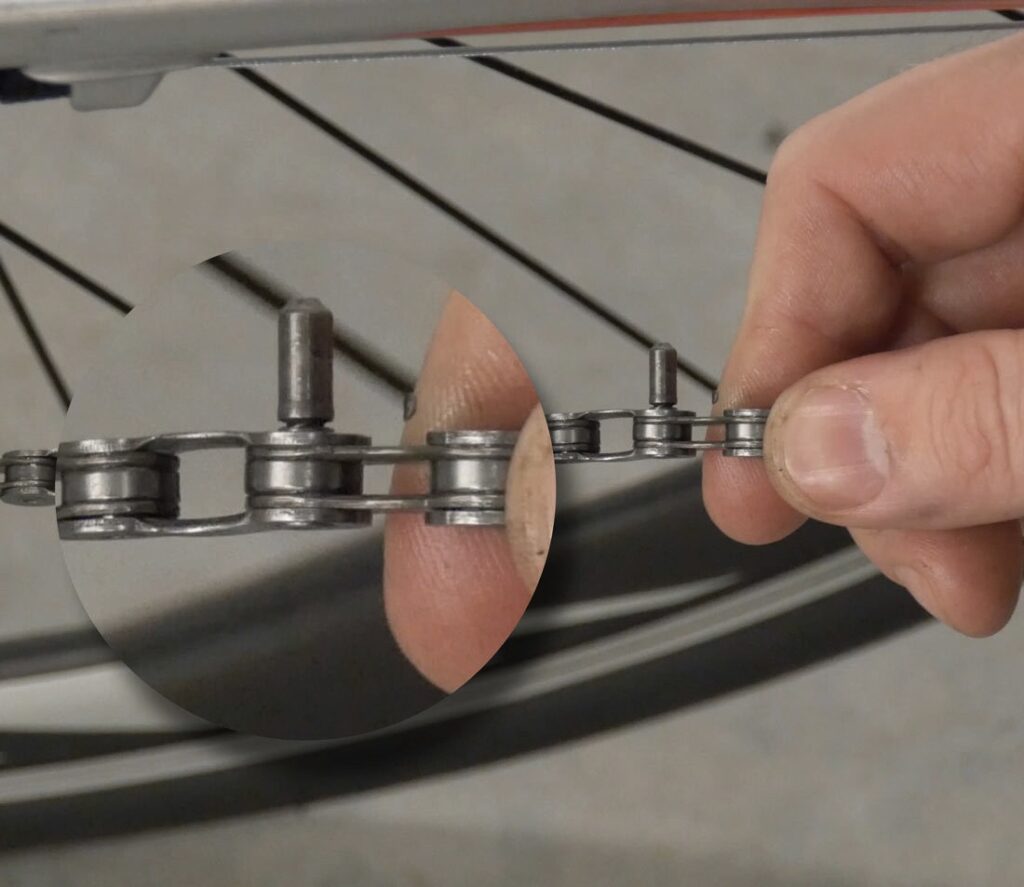
A chain reconnected using a connect rivet with a pilot tip. Image Source: Park Tool.
How to Fix a Skipping Chain on a Mountain Bike
A skipping chain is most commonly associated with improper cable tension. If your bike chain is skipping or refusing to change gears when you want to, because of improper cable tension, the following is an easy way to fix it.
To fix a skipping chain on a mountain bike due to tension, shift the chain to the smallest chain cog and the smallest chainring. Then, open the quick-release wheel axles. Now, pull the wheel back to increase chain tension or pull it toward the MTB wheel to reduce chain tension.
Step 1. Put the Chain On the Smallest Cog and Turn the Barrel Adjuster
The first step is to put the chain on the smallest cog of the cassette. To do this, just put your bike in park and pedal forward manually. Once the chain is on the smallest cog, press the shifter and see if the chain easily moves up a gear. If it doesn’t, it means that it needs more tension. To achieve that, turn the barrel adjuster all the way in and then check the shifter again to see if the chain changes gears automatically. If it doesn’t, keep adjusting the barrel adjuster until your chain starts shifting gears as it should.
Step 2. Manually Adjust the Cable
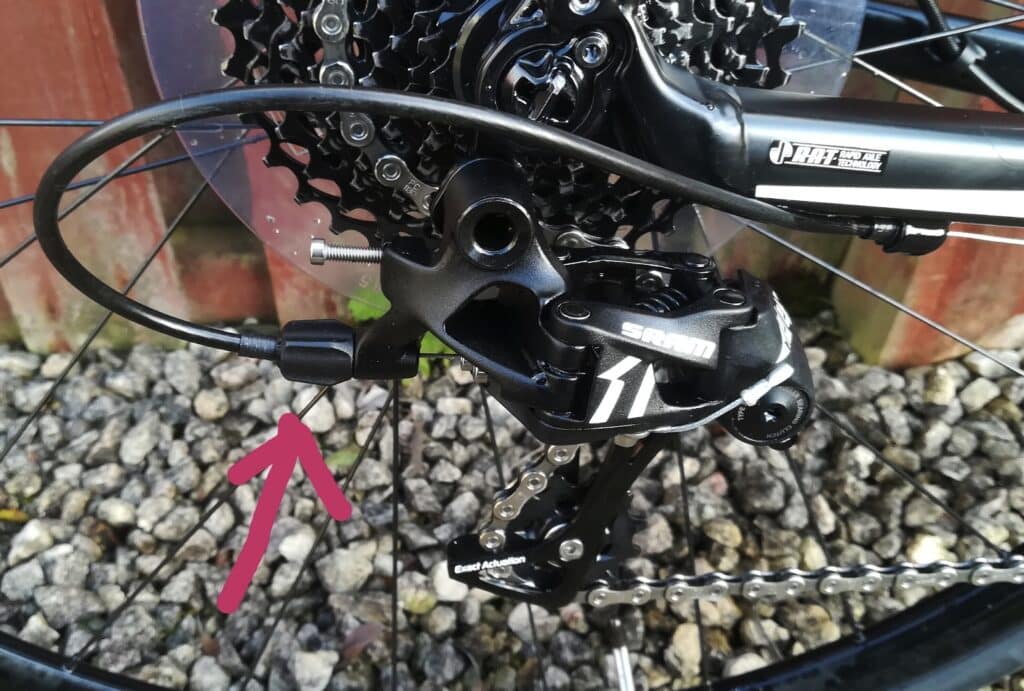
If the problem persists, you will have to do some manual adjustments to the cable. To achieve this, look for the point where the cable exits the derailleur, you will find a tightening mechanism at that point, if you need to add a little slack, push it, and if you need a bit of tightening, loosen it and pull the cable out.
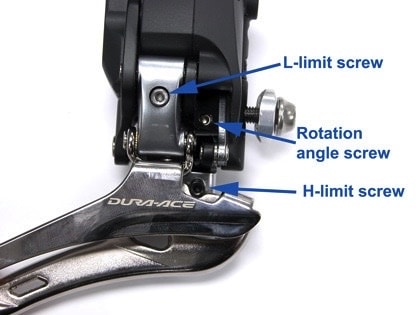
Another thing that you can do is to look for the limiting screw. In some bikes, it is labeled with an H and is located on the top of the derailleur. If you loosen this screw a little your chain may start shifting gears properly. Our article about how to tighten a mountain bike chain derailleur has in-depth instructions on adjusting a derailleur so that the chain moves swiftly during gear shifting.
How to Fix a Loose Chain on a Mountain Bike
A chain can be loose for several reasons and depending on the reason why a chain is loose, you will have to decide whether to fix it or replace it. If a chain is loose because it is stretched or worn out, there is nothing much you can do about it to fix it and the only option left is replacing it with a new one.
To fix an MTB chain that’s loose, replace the chain if it’s stretched or worn out, size the chain to the right length or loosen the rear wheel then pull the wheel backward until the correct tension is achieved then tighten the MTB wheel axle.
Option 1. Replace the Chain if it is Stretched or Worn Out
You can see if your chain is worn out or stretched by using a chain checker tool or by trying to pull it away from the chainring. Both these methods were discussed in detail, earlier in the article. To replace the chain it is best to start by removing the rear wheel to remove any tension from the chain. If your old chain is a master link chain, you will need to find the master link and remove it using master link pliers. Otherwise, you can use a chain tool to break the chain apart. The next step is to get a new chain and size it to the correct length.
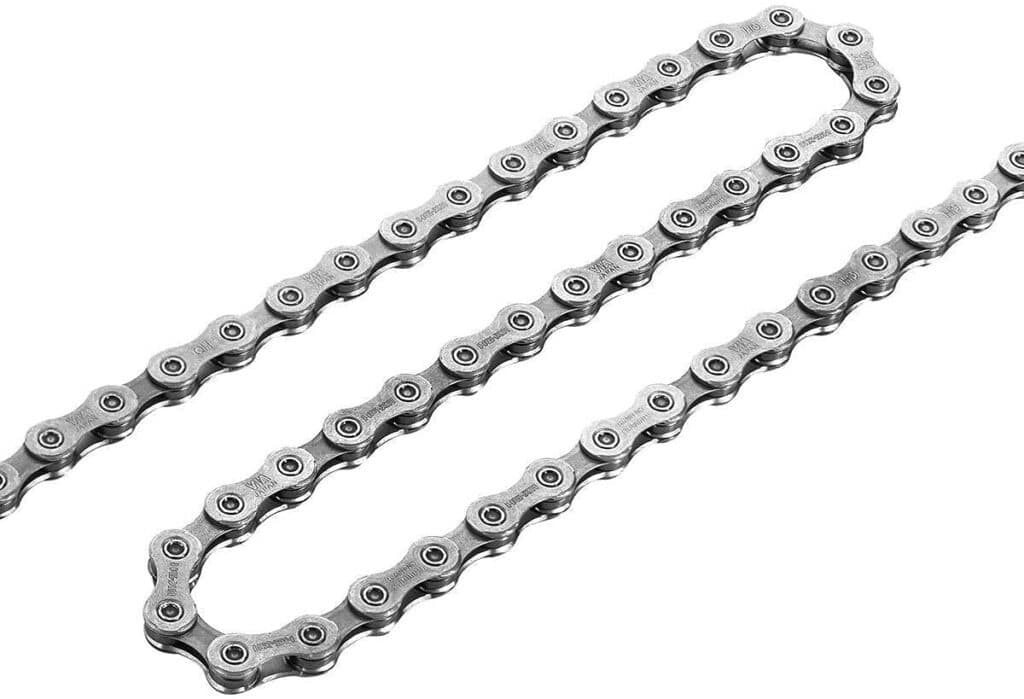
To get a new chain make sure that the chain speed mentioned corresponds with the number of chainrings on your cassette and it is best if the manufacturer of the chain is the same as the manufacturer of your rear derailleur like this. New chains like this are often longer than you require them to be, to cut the chain to an appropriate size, you can use the old chain as a reference. If the old chain is the correct length, lay down both chains in a line side by side and make sure that their outer plates are adjacent. The old chain will be stretched so it is important that you align the rivets along the length of the chain. This will give you a more accurate idea of where you need to cut the new chain. Mark the rivet where you need to cut the new chain and cut it using a chain tool.
Now it's time to route the new chain onto the bike. While doing this look for any directional arrows on the chain and be sure to follow them. Not all chains will have directional arrows though. Begin by feeding the chain through the rear derailleur and bring the chain inside the frame by pulling, feed the chain through the front derailleur, and bring both ends of the chain together and connect the chain.
Option 2. Size the Chain to the Right Length
To size the new chain using the old one, you need to confirm that it's the correct length before you remove it. To do this, shift the chain to the largest front and rear sprockets. Once the chain makes the shift, it should have two slight bends, one at each pulley. If there is slack in the chain or the chain is sagging onto itself, it is not the right size. However, if that doesn’t happen, it means your chain is sized correctly and you can use it to cut the new chain to size.
To cut the new chain to size, lay down both the chains, side by side on a flat surface. Make sure that you align the outer plates of one chain with the other. The chain will not be sized correctly if you align the outer plates of one chain with the inner plates of another. Once you have done that make sure that chains are aligned rivet by rivet and you have accounted for the stretch on the old chain. Mark the rivet of the new chain that aligns with the last rivet of the old chain and use that mark to cut the new chain using a chain tool. To get a better visual understanding of the process, watch this YouTube video tutorial by Park Tool.
Option 3. Add Tension to the Bike Chain
To add tension to the bike chain, flip the bike upside down using a bike stand or a soft surface that doesn’t cause any damage to the handlebar. The next step is to locate the derailleur screw and turn it in a clockwise motion. In some bikes, you will find it next to the letter B on a derailleur. Next, you need to disconnect the cable from the brakes to get access to the rear wheel. To do this, lift the brake lever and then raise it.
Now is the time to adjust the chain which needs to be done gradually to acquire the required tension. Begin by sliding the wheel axle towards the rear dropouts and adjusting the chain as you do so. With each small adjustment that you make, lower the brake lever to check if you have reached the desired amount of tension. Keep repeating the process until the desired result is achieved. Once you have achieved the desired tension, put everything back in place as it was. Make sure that the derailleur screw is tightened into place and the wheel is spinning properly. Our article about how to fix a bike chain that keeps hitting the frame has several suggestions for adjustments you can make to the derailleur to ensure your chain is running straight.
