Easily Fix a Mountain Bike Chain That Keeps Coming Off
One thing that can ruin your mountain biking experience is having your bike chain fall off while riding. It's not just frustrating but also quite dangerous – for you, your fellow riders, and your bike. The chain may either hang loose or jam in place between the cassette and bike frame. This can lead to your bike skipping, slipping, or jumping gears while you're pedaling. However, it is possible to sort these types of problems out and easily fix a mountain bike chain that keeps coming off,
To fix a mountain bike chain that keeps coming off, check whether it is loose, has a worn-out cog, or misaligned derailleurs. If the bike chain is loose or stretched out, tighten and adjust the tension. If the cassette cogs are worn, replace them with a good quality replacement. Finally, if the mountain bike has a misaligned derailleur, adjust it to be exactly centered over the gears.
The bike chain is an often overlooked but vitally important bicycle component that is responsible for propelling the bike forward by transferring power from your pedaling to the rear wheel. According to this research paper on the design and analysis of chain wheel mechanism in transmission systems by Sina Ghiasvand at the University of Zanjan, the chain system is very energy efficient. To further increase the efficiency of your pedaling, you can attach toe clips or pedal straps to your bike. Check out our comparison of pedal straps vs. toe clips for more information.

5 Common Chain Issues That Explain Why Your Bike Chain Keeps Falling Off
Your chain falling off poses a real danger and can lead to serious injury if your foot gets caught or if the chain jams in the wheel spoke or cassette.
Common reasons why a bike chain keeps falling off the chainring are: loose or stretched out chain, chain that's too tight or short, dirty chain, chain imperfections, or a worn-out chain.
This research paper by Cycling Research International delves into various reasons for bicycle crashes. We recommend using pedal straps and clipless pedals to keep your feet in place when cycling as an additional safety measure and for extra protection as discussed in our article on the benefits of clipless pedals on a mountain bike. Additionally, if you’ve ever wondered whether pedal straps are good then our detailed guide is for you.
To implement the fixes to the problems that we outline below, you'll need to get the right toolkit like this. You'll also find valuable information in our ultimate list of tools needed for mountain bike maintenance.
Reason 1. Chain Is too Loose or Stretched Out
The first reason that your bike chain can come loose or come off is that it is loose or stretched out.
One reason is attaching a new chain on a worn-out drivetrain in which case you will need to replace it with one like this. If the drivetrain's cassette is worn out, the chain won't fit and will jump around as you pedal, eventually becoming loose or coming off. Another reason could be that the chain itself is old and worn out, stretching it out and can be replaced with something like this. As a result, it won't fit properly onto the cogs anymore. Additionally, you might have some loose nuts on the rear axle or a damaged derailleur.
Ensure you check the bike chain by pulling on it regularly to prevent getting injured and damaging your bike frame.
Reason 2. Chain Is Too Tight or Too Short
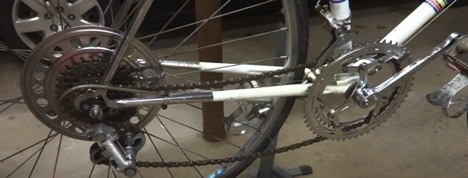
Having a chain that's too tight or short usually occurs when you change out your chain. When replacing your chain or sprockets, ensure you check your new chain length by lining it up with your old chain.
A bike chain that's too short or tight leads to decreased efficiency and extra wear on the drivetrain due to increased friction on your chain and cogs. If you shift to the largest cog in the large-large combination while riding with a short chain, you could rip the derailleur off or bend the chainring or gear teeth. In addition, riding over a sudden bump could even snap the chain.
This r/bikwrench thread on Reddit is a discussion about how to fix a chain that is too short.
Reason 3. Dirty Chain
Having a bike chain clogged with grime, dirt, or grease will wear your drivetrain faster and reduce the efficiency of your bike.
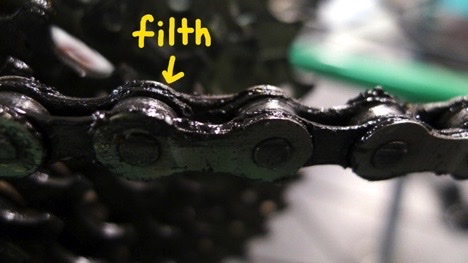
In addition, as you use your bike, dirt and grit can accumulate in the crevices of the chain and increase friction. This can cause your chain to stiffen and fall off the drive train easily. For these reasons, regularly recleaning and lubricating your chain is essential. You can read more about this in our article that provides quick steps to clean a mountain bike chain properly and lube it.
Reason 4. Chain Imperfections
A stiff, unbalanced, or bent link in your chain can lead to problems if not fixed quickly. These imperfections can be caused by chain drop, rough gear shifting, rust, or improper installation. In addition, stiff links can pop your chain off while riding as they can't curve around the cassette, chainrings, or jockey wheel. A slanted chain angle will also cause the chain to fall off due to chain rub.
Reason 5. Worn-out Chain
A mountain bike chain that keeps coming off might be the result of aging. Normal use and aging lead to natural wear and deterioration of your chain. It is easy to take your bike chain for granted, but the chain also has a life span.
According to this article by Shimano, your bike chain needs to be swapped every 2000 miles. The particular lifespan depends on your cycling pattern and maintenance. Wear and tear cause the chain to get damaged, lose its shape and elongate, leading to chain drops.
Failing to replace a worn-out chain can damage other components like the cassette and chainrings. A worn cassette, in turn, can cause any new chain you install to slip off continually. To prolong the life of your chain, ensure you maintain and clean it regularly. Check for damaged parts and replace any as soon as possible with a replacement chain like this.
How to Tighten a Stretched Chain
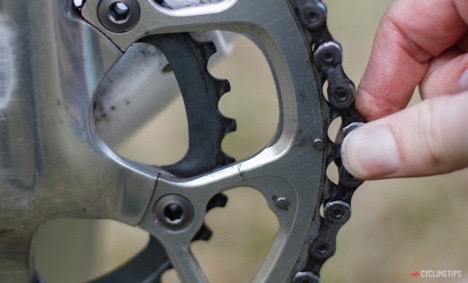
No matter how well you maintain your bike’s chain, you'll still have reason to tighten it from time to time. Thankfully the process is pretty easy. However, tightening a stretched chain may not always be the best option. If the stretch is caused by wear and tear, then it might be time to replace the chain. But if the chain is still relatively new, you can simply tighten it and get back to riding.
A loose or stretched mountain bike chain could fall off. To tighten the chain, flip the bike upside down, locate the derailleur screw, increase the tension in the chain to get the right tightness, test the chain and tire and fit everything back together.
If your bike chain is loose, check out our article that explains all the steps to tighten a mountain bike chain to help you avoid serious complications.
Step 1. Position the Bike Correctly
We recommend you place the bike on the bike stand to get started. If you do not have a bike stand, find a soft surface like a piece of cardboard to place the bike upside down without scratching it. Clean the chain using a degreaser like this. Also, wear gloves like these and keep a rag like this nearby as you work.
Step 2. Locate the Derailleur Screw
Find the body angle or B-screw on the bike. It is usually located at the back of the rear derailleur. The screw controls the derailleur's body angle by adjusting the distance between the pulleys and sprockets.

Step 3. Increase the Tension of the Chain
Disconnect the brakes from the chain and lift the brake levers to access the rear tire. Then, using an Allen key like this, turn the B-screw clockwise to increase the distance between the pulley and sprockets, and move the derailleur down and back. To tighten the chain, carefully slide the wheel back until you get the desired tension in the chain. Take this step slowly so that the chain isn't too tight. Keep checking the tension as you pull back.
Step 4. Test the Chain and Rear Wheel
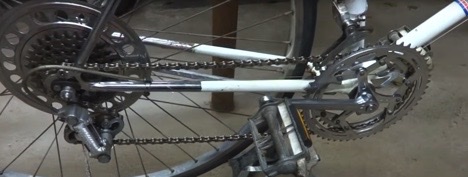
Move the chain in both directions to check if you have the right tension. If it moves too far in either direction, the chain isn't tight enough and must be pushed more on the tire. You should be able to move the chain freely half an inch in either direction.
Step 5. Fit Everything Back into Place
If you're good with the chain tension, put everything back together just as it was. Tighten the derailleur screw, ensuring the distance from the largest cog is about 6mm. Fit the rear tire back into place and lubricate the chain.
Do a final check by spinning the tire to make sure it's moving properly and not in contact with the chain or bike frame while in motion. If it comes in contact with these components, you've fitted it incorrectly and need to repeat the process.
This process may seem a bit stressful initially, but with time, you'll get the hang of it and become a pro. Follow the instructions that RJ The bike Guy gives in this video tutorial to back up our instructions.
How To Lengthen A Chain That Is Too Short or Loosen a Chain That’s Too Tight
To loosen a chain that's too tight, check the tightness and turn the B-screw anticlockwise to decrease the tension. If the chain is still too short, disconnect it and add extra links or simply replace the chain.
Follow these steps to sort out a chain that is too tight.
Step 1. Check for the Length and Tightness
To check if your chain is too short or too tight, try moving the chain in both directions. If it's too tight, the chain won't move at all, and you won't be able to push up on the lower jockey wheel and gain extra slack. Also, the bike won't be able to shift to the larger cogs due to the high tension. On the other hand, a chain with proper length can reach the large-large combination easily. It can also work in the small-small combination without the rear derailleur overlapping.
Step 2. Check for any Damage
Check that there is no wear on the cassette teeth or the derailleurs. If there is, replace the cog with one like this before continuing.
Step 3. Loosen the Chain if too Tight
To decrease the chain tension, locate the B-screw of the rear derailleurs. Then turn the screw anticlockwise to move the pulley closer to the sprocket. This moves the derailleur up and forward.
Step 4. Expose the Chain
If your bike chain is too short, flip the bike upside down and remove the rear wheel to have better access to the chain.
Step 5. Disconnect the Chain
Check the chain for a master link and, if present, use a master link plier like this to disconnect the link. You can also use a bike chain tool like this to cut the chain. Install the chain tool and connect it to the linking rivet. Next, turn the handle to drive out the rivet and disengage the chain. Then remove the chain from the bike.

Step 6. Check for the Proper Length and Add Extra Links
To get the right length for your chain, measure the maximum chain length required by wrapping the chain around the largest cog and chain ring in a fully compressed position. Add one extra inch or one or two links to give room for chain growth – the lengthening which occurs between the bottom bracket and rear axle with suspension compression as you ride.
Using a master link like this, add a couple of links to the chain. If that's not applicable, get a new chain and make sure it is the right length using the process above.
Check out this YouTube video by Global Cycling Network for additional tips on calculating the correct chain length for your bike.
Step 7. Re-install and Test the Chain
Route the chain through the derailleurs, sprockets, and chainrings. Test the installation and ensure the chain can move 0.5 inches in both directions. Fit everything back in place and check that the chain and tires are all working properly.
How to Clean a Dirty Chain
Using a cleaning kit like this, you can perform a basic and advanced clean without removing the chain. According to this manual by Shimano, using neutral detergent and grease to clean and lubricate helps extend the chain's life.
A dirty chain will damage the drivetrain of a mountain bike. To clean a dirty bike chain, apply degreaser and scrub it onto the chain. Next, use detergent and warm water and gently wash the grease off. After drying, coat the entire chain in chain lube.
Step 1. Get the Tools You Need
Get a cleaning kit like this that includes firm brushes, chain lube, disposable gloves, and a chain degreaser. Also, get a hose, bucket of water, detergent, and a rag. Put on the gloves for protection.

Step 2. Apply Degreaser and Scrub the Chain
Brush a bicycle degreaser onto the chain. Then, slowly backpedal the chain against the brush from multiple angles to scrub the grime and dirt off. Also, scrub the cogs, cassette, derailleurs, and chainrings using the same process.

Step 3. Wash it With Detergent and Water
Wash any leftover degreaser off the components using soap, a clean brush, and warm water. This step helps the lube to settle fully into the chain.
Step 4. Dry and Lubricate the Chain
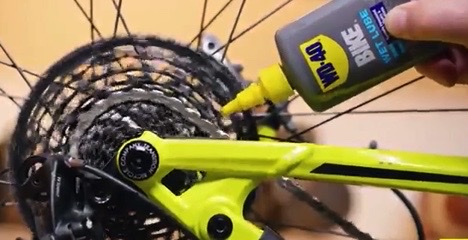
Allow the bike to dry in the sun or wipe it down with dry rags. Once dry, slowly backpedal the chain while applying chain lube like this to each roller link. Do this until the entire chain is lubricated. Use a clean cloth or rag to clean off any excess lube.
How To Fix Imperfect Chain Areas
To fix stiff links in the chain, use your hand, chain lube, or chain tool to loosen the link. In addition, you can remove and replace the links with problems.
Chain imperfections like stiff or bent links caused by chain drop, rough gear shifting, rust, or improper installation, cannot bend around the drivetrain and will eventually come off. Fix a stiff chain by lubricating it, loosening it, or removing it completely.
Step 1. Lubricate the Chain
Get a good-quality chain lubricant and apply it to your chain. This usually fixes a stiff link.
Step 2. Use a Chain Tool
Check for the stiff link in the chain and connect the chain tool to the rivet. Turn the handle gently and loosen the link with the tool.
Step 3. Fold the Link
Try loosening the stiff link by folding the link and bending it to 90 degrees on either side with your hand. Do this until the chain moves smoothly again.
Step 4. Shorten the Chain
If the previous steps don't work, you can attempt to remove the defective links in the chain. First, take off the chain and remove the imperfect areas using a chain splitter like this. If the new length is too short, use a master link to add new quality links to the chain and re-install it.
How to Replace a Worn-out Chain
A worn chain can lead to damage to the drivetrain and the chain falling off. To replace worn chains, check for the severity of the wear, remove the chain using a chain tool, and install a new chain.
Carefully replace your worn-out chain by following these steps carefully:
Step 1. Check the Chain Health
Use a chain wear checker like this to diagnose a worn chain. The tool has two sides indicating the percentage to which the chain has stretched from its original length. This is usually 0.5% and 0.75%. Hook the chain checker on the chain and measure the degree of stretch. If the chain can fit from one roller to the gap of the next roller with the 0.5% side, your chain has stretched more than 0.5%. This is the same for the 0.75% or 1.0% side.

Step 2. Check the Number of Rear Gears
If your bike has 11 gears or more and has a stretch of 0.5%, replace the chain. Also, replace if your bike has 10 gears or less and a stretch of 0.75%. A chain on a single-speed or two-sprocket bike with 1.0% will also have to be replaced.
Step 3. Remove the Old Chain
Disengage the chain using a quick link or a chain tool and take the chain off the bike. Inspect and wipe down the chainrings and crankset. Brush them down with a cleaning solution.
Step 4. Determine the New Chain Length
Buy an identical bike chain like this and use the old chain to determine the proper length. Because the old chain will have elongated, your new chain should be a few links shorter. You can also run the chain through the front derailleur over the large front chainring and large rear sprocket. Next, pull the ends of the chain together. The right length is where the two ends meet, plus one extra inch or 2 full chain links of overlap. Use a chain tool to remove the surplus links.

Step 5. Install the New Bike Chain
Route the chain through the front derailleur cage, across the chainstay, over the rear cassette, and through the rear derailleur. Reconnect chains that do not have a master link using a chain pin like this. The pin must be compatible with the chain model. For chains with a master link, assemble the ends together and snap the link into place with a master link tool.
Why the Chain Keeps Coming Off Your Bike When Changing Gears - and How to Fix It
The bike chain connects all the gears on a bike and helps change gears while riding. This is why chains commonly slip off when changing gears if there's a problem.
If the chain keeps coming off when changing gears, check the nuts and bolts to see if any are loose and tighten them to the manufacturer's specifications. Check for cog wear and tear and replace any worn cog. If bad shifters or shifting cables are causing the chain to slip off, replace them with high-quality components. A bent derailleur could also cause a mountain bike chain to fall off and will need to be fixed or replaced.
Reason 1. Loose Bolts
Loose bolts are usually overlooked when a mountain bike chain keeps falling off. However, before you start replacing any component, you need to make sure no bolt or nut is loose. Nuts and bolts around the bike can get loose from regular use and cause problems. For instance, loose bolts on the rear wheel axle shorten the distance between the pedals and the wheels, restricting movement and reducing efficiency while riding. This article from Bike Rumor explains this clearly.

Reason 2. Cog Wear and Tear
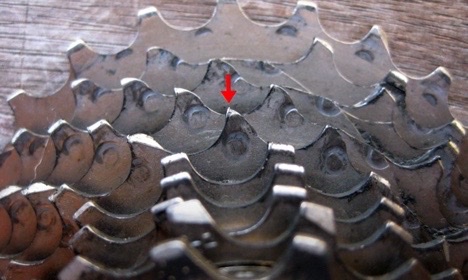
Having worn or bent cassette cogs teeth can also cause your bike chain to slip when changing gears. This wear and tear could happen naturally from use or be caused by long-term use of stretched or worn chains or poor bike maintenance in which case our tips for quick and proper mountain bike chain maintenance could be helpful. Because the bike chain is connected to the drivetrain through the cogs, wear and tear on the cog will lead to bad contact and cause the chain to slip easily.
Reason 3. Poor Quality Shifting Mechanism
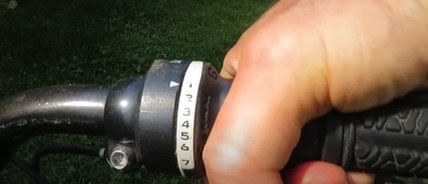
Another reason your bike chain is slipping off could be bad shifters that can't maintain proper cable tension while the bike is in motion.
A malfunctioning gear shifter also causes unwanted gear shifting, making the chain jump gears while riding, in which case it should be replaced with something like this. To test the quality of your shifters, pull on the shifting cable and check for any loss in tension. It is usually preferable to replace the shifters when they're damaged. If your shifters are only stiff or stuck, then check our article to learn how to fix a gear shifter that is stuck.
The problem could also be as a result of faulty shifting cables. With time and use, the cables get stretched and may need to be adjusted or replaced completely. Old or rusty shifting cables can hinder shifting between gears and also cause the bike chain to slip and will need to be replaced with something like this.
Reason 4. Bent Derailleur Hanger
The derailleur hanger attaches to the frame to secure the derailleur. The component is usually prone to bending from a hard contact or shifting under load. Because carbon-fiber frames are relatively brittle, as this research from the Sensors Journal discusses, derailleur hangers are made of aluminum to prevent the frame from being damaged. This means when the bike hits something hard, the hanger will bend to protect the frame.
Due to its function, the derailleur hanger has to be vertically aligned with the cassette cogs. Therefore, any slight bending will result in bad shifting, clicking sounds, and chain dropping while riding.
How to Check & Fix Bolt Problems
To fix loose bolts, use a torque wrench to tighten the bolts and replace damaged bolts with new ones.
Check out this article by Sheldon Brown for more information on torques.
Step 1. Check the Manufacturer's Specifications
The manufacturer's torque recommendations are a great place to start when fixing loose bolts. Check the manual or contact the manufacturer in case of updated torque specifications. For example, in this manual by Campagnolo, the crankset manufacturer set the torque values for the crank closing ring nut at 8 – 10 Nm and the chainring securing screws at 8Nm.
Step 2. Choose a Torque Wrench With the Appropriate Specifications
Now that you know the manufacturer's specs select a torque wrench with the appropriate force. This torque wrench works between 2 – 14 Nm or 18 – 124 lbs, while this torque wrench works between 10 – 60 Nm or 88 – 530 lbs.

Step 3. Tighten the Bolts
Tighten any loose nuts and bolts according to the recommended Newton meter or torque specification. In particular, inspect the bolts on the cassette, derailleurs, and chain stays. It is important to periodically check that all the bolts on the bike are tightened to the right torque values.
Step 4. Replace the Bolts
You might have discovered that your bike was missing a bolt from it loosening and falling off, or that some crucial bolts were rusty. In these cases, it would be best to replace the bolts with something like this. Contact your bike manufacturer to find out the proper size or visit your local bike store to figure out which size you need.
How to Check and Fix Cog Wear and Tear
To fix cog wear and tear, inspect the chainring and cassette carefully to see if a few or most of the cog teeth are damaged. Worn cogs have tips that look like “shark teeth” rather than blunt tips. If teeth are worn, replace the chainring or cassette.
If most are worn, replace the components with good-quality models like this.
Step 1. Gauge Cog Wear and Tear

Checking cog wear and tear can be a bit more challenging than chain wear. However, you can use this sprocket wear indicator to check for wear and tear. First, wrap the chain around the cog and tension it with the level. Then, check that the last link of the chain fits over the corresponding cog tooth easily. If it does not, then it's time for a replacement.
Step 2. Remove the Worn Cassette
You'll need a chain whip or cassette pliers and a lockring tool to replace your old cassette. A chain whip like this helps to stop the cassette from freewheeling, while the lockring tool, like this one, helps to remove and install cassette lockrings. Wrap the chain whip around the cog and turn the lockring tool anticlockwise to loosen the lockring. Slide the cassette off.
Step 3. Install the New Cassette
Get a new bike cassette like this. Ensure the new cassette cogs are in order with the necessary bike spacers and fit them on the bike. Next, carefully grease the lockring and thread it on the cassette. Torque the lockring with the tool to the manufacturer's specifications.
How To Replace a Shifter and Shifting Cables
To replace a shifter and shifting cables, first, remove the handlebar grip. Then remove the shifter cables and shifter. Then install new shifting cables and shifters. Finally, reattach the grip and test by shifting gears while pedaling.
If your shifter cannot be repaired or adjusted it will have to be replaced. You can do so by following the steps below:
Step 1. Remove the Handlebar Grip
Pry the grip from the handlebar on the same side as the shifters you want to remove. For a more detailed guide, check out our article on how to remove mountain bike grips.
Step 2. Remove the Shifter Cables and Shifter
Unbolt the shifter cable from the rear derailleur using a compatible hex wrench from a set like this. Next, trace the cable to the gear shifter and push it through the shifter to remove it from the bike. Then, screw off the shifter from the handlebar. For more tips, consult our article regarding how to remove mountain bike grip shifters.
Step 3. Install New Shifting Cables and Shifters
To make sure you select the right shifters, read our article on how to choose mountain bike grip shifters. Get your new shifter like this and tighten it onto the handlebar. Measure the appropriate length of shifting cable and housing before installing. Route and lubricate the new shifting cable through the shifters into the housing. Connect the cable to the derailleur's lamp and bolt it down. Adjust the cable as necessary to ensure smooth shifting.

Step 4. Reattach the Grip and Test the Installation
Lubricate the grip to ensure it slides on easily. Our article on mountain bike grip installation explains this in greater detail. Shift the derailleur through all the gears to ensure it shifts to the right gears correctly and properly.
How to Fix a Bent or Misaligned Derailleur Hanger
To fix a bent or misaligned derailleur hanger, first inspect the existing derailleur hanger and determine if it is bent or broken. Use a hex wrench to bend the hanger back into alignment. If the hanger is broken, replace the derailleur hanger.
Step 1. Inspect the Derailleur Hanger for the Defective Part
Check to see if the hanger is actually bent or misaligned. If the hanger is not parallel to the cogs and shits inwards or outwards, then it needs to be fixed.
Step 2. Manually Bend the Derailleur Hanger
Use a hex wrench to bend the hanger back into alignment. Carry out this step gently so as not to break the hanger. This video tutorial by Cyclist shows you exactly how to fix a bent derailleur.
Step 3. Remove the Derailleur Hanger
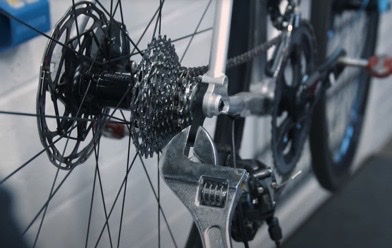
In the case where the derailleur hanger breaks, you will need to replace it. To remove the derailleur hanger, you must take the rear wheel off the bike first. Then, using a hex wrench, unbolt the derailleur from the hanger. Next, remove the hanger insert from the bike frame.
Step 4. Install a New Derailleur Hanger
Wipe the entire dropout area with a bike cleaner and rag and grease the frame area. Tighten the new hanger like this into place. Lubricate the mounting bolts and reconnect your derailleurs. Tighten all bolts according to the manufacturer's torque values.
Step 5. Test the New Hanger
Reattach the rear wheel and ensure everything works normally as before.
What To Do When the Chain Keeps Coming Off the Rear Derailleur
The rear derailleur is one of the main components of the bike gearing system, which helps to shift rear gears by moving the bike chain at the rear cogs. The front and rear derailleurs are set with limit screws to control derailleurs and stop the chain from falling into the spokes or frame. However, when the derailleurs are misaligned or the limit screws are loose, the chain is more likely to fall and get stuck.
If the bike chain keeps coming off the rear derailleur, set up and inspect the rear derailleurs, fully extend the rear shifter, expose the limit screws, adjust the limit screws, adjust the inner wire tension, adjust the body angle, and finally test the derailleurs.
Inspect your rear derailleur by checking if it is centered over your gear. Bent or misaligned derailleurs affect the whole gearing mechanism. They disturb the tension in the shifting cables and make it difficult to shift gears. Failing to fix this issue quickly can cause serious long-term damage to your bike.
Step 1. Inspect the Rear Derailleur
Flip the bike upside down on the bike stand. Spin the pedals and take note of the rear derailleur as you change gears. If the derailleur is not centered with the gear, then you need to adjust it.
Step 2. Fully Extend the Rear Derailleur
Shift the bike chain onto the largest front chainring and the smallest sprocket/cog in the rear. This position allows the upper pulley to be aligned with the smallest cog. Keep clicking the rear derailleur until there are no clicks left in the shifter mechanism to extend it fully.
Step 3. Expose the Limit Screws
To access the limit screws, loosen the barrel adjuster at the gear shifter by turning anticlockwise a few turns.
Step 4. Adjust the Limit Screws
The derailleurs have 2 limit screws – the H-crew and the L-screw. To adjust the outer limit, tighten the H-screw anticlockwise by a full turn to move the derailleur to the right. Next, turn it clockwise to move the derailleur to the left. Adjust until the upper pulley and sprocket are aligned.
To adjust the inner limit, first move the chain to the largest sprocket, aligning the upper pulley with the sprocket. Next, turn the L-screw clockwise to move the derailleur to the right and anticlockwise to move it to the left. Adjust until the pulley and sprocket are perfectly aligned.
Step 5. Adjust the Inner Wire Tension
If the chain does not fall easily onto the next smaller cog when you shift through the gears, then you need to lessen the inner wire tension. First, tighten the barrel adjuster by turning clockwise a few turns. On the other hand, if the chain doesn't climb easily onto the next larger cog, then increase the inner wire tension by turning the barrel screw anticlockwise.
Step 6. Adjust the B Angle
The body-angle or B-screw is used to adjust the distance between the upper pulley and the largest sprocket, which should be between 5-6 mm. To increase the distance, turn the B screw clockwise and to decrease the distance, turn it anticlockwise.
Step 7. Test the Derailleur
Shift through different gears and check that the rear derailleur remains centered over the gear. If adjusting the rear derailleur does not align it properly, consider purchasing a new rear derailleur like this.
Step 8. Replace the Rear Derailleur
To replace your rear derailleur, start by removing it. Shift your chain onto the smallest rear cog. Next, pull off the shift cable's end cap and loosen the pinch bolt. Then, remove the cable and chain from the derailleur, and unscrew the mounting bolt in an anticlockwise direction to remove the derailleur.
To install the new rear derailleur, first, grease the mounting bolt and attach the derailleur onto the derailleur hanger. Next, run the chain through it and screw in the cable clamp bolt to secure the cable. Finally, use the processes outlined to tune up and adjust the derailleurs if needed.
How to Fix it When the Chain Keeps Coming Off the Front Derailleur
The front derailleur is just as crucial as the rear. It shifts the front gears by moving the bike chain between the front chainrings. The bike chain could be coming off the derailleur due to misalignment from a faulty limit screw setting or incorrect height.
To fix a chain that keeps coming off the front derailleur make sure the front derailleur is set up properly, set the height and rotational angle, adjust the upper limit setting, adjust the lower limit setting, set the inner wire tension, test the front derailleur's performance, and if the chain is still coming off replace the front derailleur.
To check if the front derailleur is misaligned, gauge the distance between the derailleur and the large chainring. Too far and the derailleur might shift poorly; too low and the derailleur might jam the chain while shifting. In addition, check the limit screw to see if it's set properly. Also, check the front derailleur rotational angle. If the derailleur is not parallel to the chain, then it needs to be readjusted. Lastly, check that the wire tension is set properly – not too tight or loose.

Step 1. Set up the Front Derailleur
Place the bicycle on a bike stand like this or upside down on a soft surface. Then lubricate the pivot point of the derailleur, inner cable wires, and their pinch bolts.
Step 2. Set the Height and Rotational Angle
The correct height is a distance of 1-2 mm between the lower edge of the outer cage plate and the outer chainring. To adjust the height, release the inner cable tension and loosen the front derailleur clamp bolt. Then, change the height of the cage as needed until it is set correctly and tighten the clamp bolt.
The correct position for the front derailleur cage is parallel to the chain. Release the inner cable tension and loosen the clamp bolt. Carefully rotate the cage as needed and tighten the clamp bolt.
Step 3. Adjust the Upper Limit Setting
Like the rear derailleurs, the front also has two limit screws – the H-screw and L-screw. The H-screw sets the upper limit, while the L-screw sets the lower limit. To adjust the distance between the outer chain plate and the chain, first, shift the chain to the largest front chainring and smallest rear cog. Then turn the H-screw clockwise to move the front derailleur toward the bike frame and anticlockwise to move the derailleur away. The correct upper limit setting is a distance of about 1mm between the outer chain plate and the chain.
Step 4. Adjust the Lower Limit Setting
The correct lower limit setting is a distance of 1mm between the inner chain plate and the chain. So first, shift the chain to the smallest front chainring and the largest rear cog to set the lower limit. Now screw the L-screw clockwise to move the front derailleur away from the frame and anticlockwise to move the derailleur closer. Keep adjusting till you get the correct setting.
Step 5. Set the Inner Wire Tension
If the chain is not shifting smoothly from the smallest to the largest chainring, then the inner wire tension needs to be increased. On the other hand, if the chain is not moving smoothly from the largest to the smallest chainring, then the tension needs to be lessened.
To increase cable tension, turn the barrel adjuster on the shifter anticlockwise. To decrease cable tension, turn the barrel adjuster clockwise.
Step 6. Test the Front Derailleur's Performance
Spin the pedals and watch the front derailleurs as you shift the chain between chainrings. It should work smoothly without throwing the chain off the extreme chainrings. If you can't shift the chains from the largest front ring smoothly, then the limit is too tight. Loosen and re-adjust as outlined above.
Step 7. Replace the Front Derailleur
If the adjustments don't work or the front derailleur is damaged beyond repair, then replace it. To remove the old derailleur, shift the bike chain onto the smallest chainring in front. Remove the cable and chain from the derailleur. Now, screw off the derailleur mounting bolt and detach the derailleur from the bike frame.
Install the new front derailleurs by clamping them in place using lubricated mounting bolts. Route the chain through the derailleur and reconnect it. Using the specifications we outlined earlier, adjust the derailleur height, rotation, limit screws, and cable tension as needed.
More Reasons a Mountain Bike Chain Keeps Falling Off
There are some other reasons for a mountain bike chain falling off. They may seem silly or unimportant but these factors can make a big difference to your mountain bike chain.
If a mountain bike chain keeps falling off, check if there is too much lube. To fix this, wipe the chain. If the chain keeps falling off due to compatibility issues, check the manufacturer's specs and get the proper components. If the chain gets thrown off on rough and hard trails, install a chain catcher, chain guide, or tensioner, or upgrade your drivetrain. Finally, if the chainring or teeth are twisted, bend them back into shape or replace them.
Reason 1. Excess Lube
Excess lube can also lead to your bike chain falling off frequently. This is because it causes the chain and cog teeth to lose contact, making it easy for the chain to slip over the teeth. In addition, lube attracts too much dirt and dust, decreasing the lifespan of the components.
Reason 2. Incompatible Drivetrain Components
Different bike chains have different specifications. This fact is important to remember when purchasing new replacements for drivetrain parts. You must get a chain compatible with the other components like the chainrings and crankset. Incompatibility means the drivetrain components won't fit properly and is more likely to fall off. For instance, a narrower chain on a wider chainring set will cause the chain to fall between the two chainrings while shifting.
Reason 3. Rough Terrains
Hitting hard bumps or crashing while riding can cause the chain to dislodge and drop off. If your chain keeps falling off while riding on rough terrains, you must upgrade your drivetrain.
Reason 4. Bent Chainring or Chainring Teeth
Bent chainrings or chainring teeth can also lead to your chains constantly slipping off. It is usually caused by accidents or a big drop down a rough downhill trail. If this is your preferred type of riding why not check out our guide that outlines how to buy downhill mountain bike armor for extra protection?

How to Check and Fix Excess Lubrication
To clean a chain and drivetrain that has excess lubricant, first use a dry rag to clean the chain. Then regrease the chain and drive train.
Step 1. Clean the Chain and Drivetrain
Use a dry rag to clean the chain and entire drivetrain properly. You can also use a brush with soap and water to scrub off any extra grease from the links.
Step 2. Regrease the Chain and Drivetrain
After letting the components dry, use only a small amount of chain lube to regrease the chain and drivetrain.

How to Check for Compatibility
Step 1. Check for the Number of Rear Cogs
Mountain bikes can have cassettes with 5 to 12 cogs. As the number of cogs on the cassette increases, the spacing becomes narrower. To fit these spaces between the cog teeth, the chains made for the narrower drivetrains also tend to be thinner.
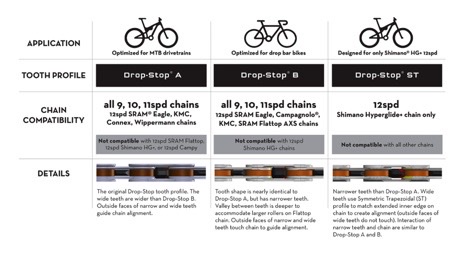
Step 2. Check the Manufacturer References
Ensure that your bike's drivetrain does not need a specific chain model. The drivetrain might not be cross-compatible with chains from other manufacturers.
How to Fix Chain Dropping on Rough Terrains
To fix a chain that keeps coming off while riding on rough terrain, use a chain catcher, a chain guide, or upgrade the drive train.
Tip 1. Get a Chain Catcher
A chain catcher like this helps to prevent your chain from falling off the chainring. It attaches to your front mech bolt and provides the needed protection for your chain when shifting to a small chainring.
Tip 2. Install a Chain Guide or Chain Tensioner
Chain guides like this help to hold the chain in place while pedaling. They also prevent obstacles on the trail from damaging your chainrings.

Tip 3. Upgrade the Drivetrain
Bicycle component manufacturers like Shimano are now producing high tension derailleurs to help solve the problem of chains falling off mountain bikes. You can upgrade your drivetrain to this solution to fix your chain dropping in rough terrains.
How to Fix Bent Chainring or Chainring Teeth
To fix a bent chainring or chainring teeth, first backpedal the chainring to check for slight bends in the chainring. Then use a wrench or chainring straightener to bend the chainring back into place. If the chainring is difficult to fix, replace it with a new chainring.
Step 1. Backpedal the Chainring to Check for Any Problems
Check for any slight bends in the chainring by backpedaling. Take note of the distance between the chainring and frame. If the distance changes, then the chainring is most likely bent.
You can also verify by placing your hand against the frame and gently pushing it into the rotating chain. If there is any change in resistance pushing back against your hand, then the chainring is bent.
Step 2. Bend the Chainring Back Into Place
You can use a wrench to bend the chainring carefully. You can also make use of a chainring straightener tool like this to straighten the chainring.
Step 3. Remove the Old Chainring
If the chainring is really bent out of shape or you don't want to or cannot fix it, go ahead and replace it. Use a hex wrench or Torx wrench like this to unbolt the chainring. Remove the crank to make the process easier. After removing the chainrings, clean the mounting surfaces with a clean cloth and lubricate as needed.
Step 4. Install the New Chainring
Get a quality chainring set like this but ensure it is compatible with the crankset. Install the ring by lining up the bolt holes with those of the crank. Then, bolt down the chainring to the appropriate torque specifications, applying a thread locker like this.

Step 5. Test the New Chainring
Test the new chain ring once you have installed it successfully to check that it is running smoothly.
